Reusable APEX Dynamic Actions
How to define custom Dynamic Actions in APEX, and call them from JavaScript.

I am a freelance developer from Denmark, working on Oracle Platform projects - mainly Oracle Application Express (APEX).
Dynamic Actions and JavaScript
Dynamic Actions (DA) in Oracle Application Express (APEX), are powerful components that enable client-side interactions. Traditionally client-side logic was written in JavaScript, but after the introduction of Dynamic Actions, this logic can be declared, instead of developed.
The declarative approach has several advantages:
When we declare the logic instead of doing the development manually, we limit coding mistakes.
The declarative approach provides a better overview of the client-side logic that is active on the APEX page. Whereas JavaScript code is often hidden in files on the web server, defined in static files, or at page-level properties.
Dynamic actions can be defined (bound) to page elements (regions, items...), or can be globally defined at the document level.
APEX has several built-in actions, which can be used, without doing JavaScript coding:
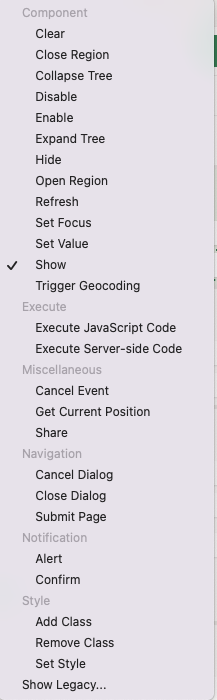
At some point, these built-in actions are not enough, and we will have to resort to hand-coding the client-side logic. This article outlines a technique where these JavaScript snippets can be declared in APEX as custom events, and thereby reused throughout the page or application.
Declaring custom Dynamic Actions
Dynamic Actions are typically defined to trigger when a specific event occurs, ex. change, page load or click. However, DA can also be defined to trigger when a custom event happens. I.e. an event that you, as a developer, define.
Think of these custom events as user-defined functions, that are declared once (and thereby visible in the page designer), and callable from other dynamic actions or JavaScript.
To set up custom events: simply create a new dynamic action, and choose Custom as the event:
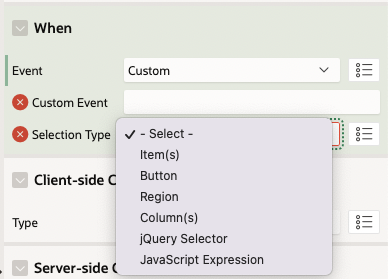
When specifying the event as custom, APEX prompts for:
Custom Event: A user-defined name you give to the event (this should be used when calling the event).
Selection Type: Page element or construct used to trigger the event. This can be used to bind the event to a specific scope on the page. The selection type can also be a JavaScript object such as document - thereby placing the event at the page scope.
Here is an example:
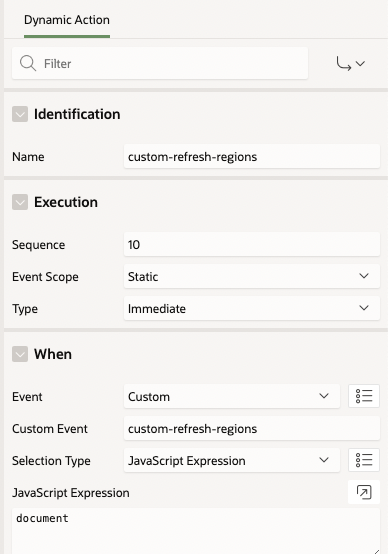
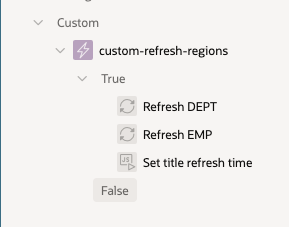
This custom event is defined at document level, which is important when calling the event. The actions for the event are defined as usual:
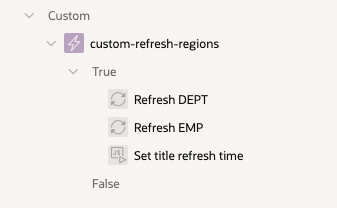
Note that only the true actions will be run when triggering the custom event (unless you specify a Client-side Condition). Any action in the predefined list delivered by Oracle can be added to the event. If the builtin actions are not sufficient, the code can be written in JavaScript. Ex.:
The custom event (custom-refresh-items) could also just consist of one action with a block of JavaScript code, thereby making the event appear as a declared JavaScript function or snippet (visible in the page designer), and callable from other places of your choice.
Calling the custom event
Now that the event is set up, we can start calling this from other dynamic actions. This is achieved by using the apex.event.trigger(...) function (part of the event namespace delivered with APEX):
https://docs.oracle.com/en/database/oracle/apex/22.2/aexjs/apex.event.html

Applying this syntax to our custom event means we can call it using:
apex.event.trigger(document, 'custom-refresh-regions');
Let us apply this to a couple of events on the APEX page:
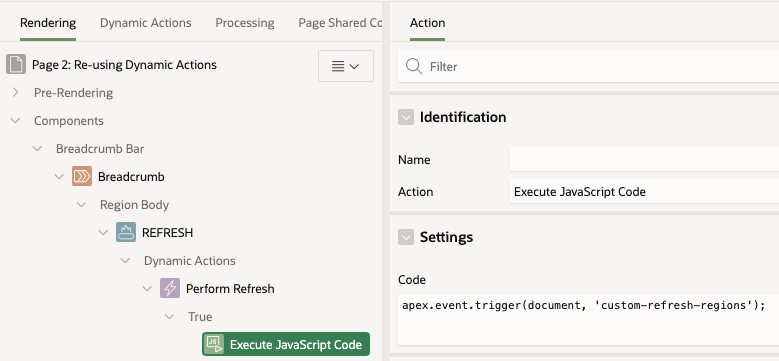
When the user clicks a refresh button, the page should be refreshed
There should be an automated refresh every 60 seconds
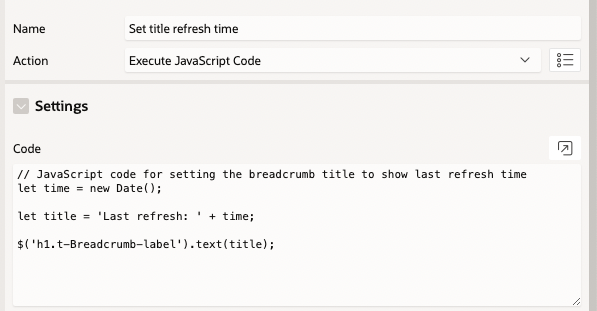
When one of these conditions occurs, both regions on the page (DEPT, EMP) are refreshed, and the breadcrumb title updates to show the last refresh time.

Activating the custom event when clicking the Refresh button. The Perform Refresh dynamic action is driven by a click event on the REFRESH button, which activates a JavaScript action that performs the call to the custom event:
We also want the refresh to be performed automatically every 60 seconds, so let us set up another action to do that. To achieve this we need to activate a timer when the page is loaded:
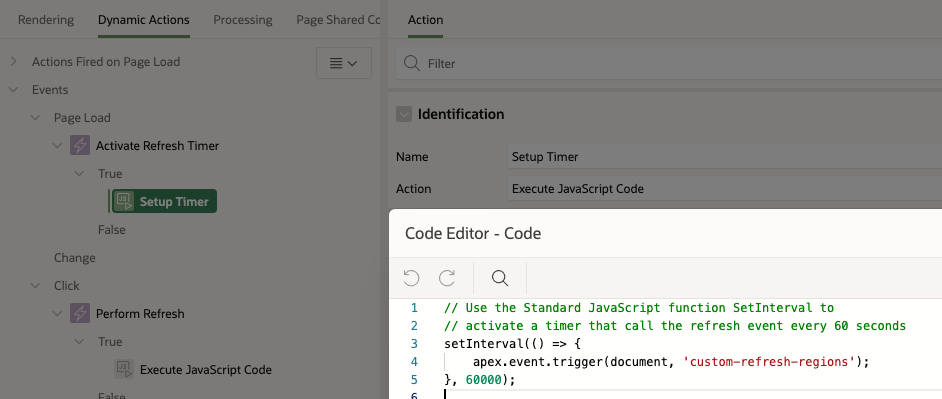
This dynamic action is triggered on page load and has a single JavaScript action that sets up the timer, using setInterval(...). The timer function (first parameter) is a function that calls our custom event.
This technique is quite powerful because of the way that JavaScript can trigger custom events, which can then perform a multitude of actions. The code becomes more visible because it is declared in the page designer (as opposed to hidden in large JavaScript code files):
Going a step further
Binding custom events to other components
Custom events can be bound to other elements in the DOM. We might have a use case where some events are only relevant for certain elements on the page. Ex. we could have a custom refresh event specifically for the Department region.
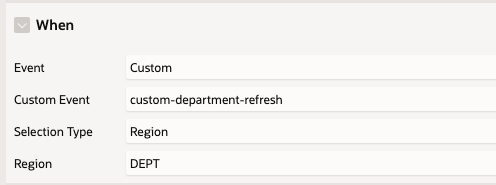
To set this up, simply set the Selection Type to Region, and choose the department region.
When triggering this event, we need to supply the JQuery selector for the Department region:
apex.event.trigger('#dept', 'custom-department-refresh');
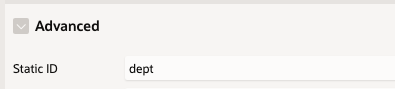
Note: for this to work, please make sure you have set a static ID for the Department region:
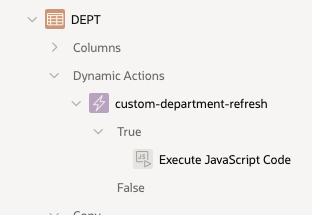
When defining custom events at the component level, they will show up in the page designer as dynamic actions under the chosen element, making it easy for other developers to get an overview of logic bound to this element:
Passing parameters to custom events
As with calls to JavaScript functions, it is very useful to be able to pass parameters. Taking a look at the documentation for triggering events, notice the third parameter pData:
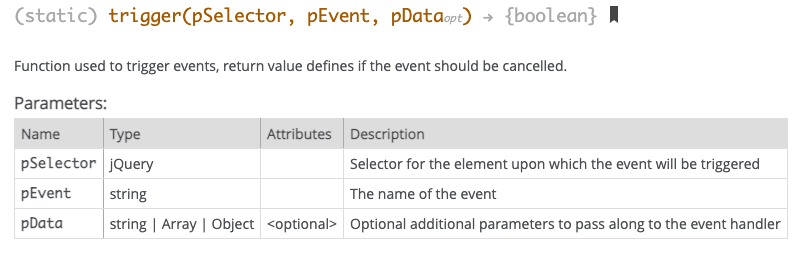
This parameter can be a string, array or object, which makes it very flexible. Here are some examples of how this can be used:
// Passing a string
apex.event.trigger('#dept', 'custom-department-refresh', 'Hello world');

// Passing an object
let obj = {
    message: 'My refresh message',
    timeoutSec: 60
};
apex.event.trigger('#dept', 'custom-department-refresh', obj);
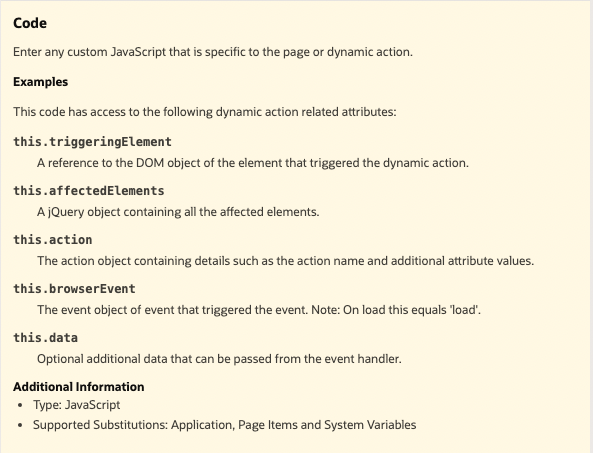
Receiving the pData in the custom event is possible in a JavaScript action. This should normally be the first action, which then handles the reception, and uses the incoming data to set page items etc. The data is available in the this context which is set when the custom event is started. The this.data element contains the data that is passed in.
Here is an example of receiving and using the incoming data in an action of type JavaScript:
// Grab the incomming pData
let data = this.data;
let message = data.message;
let timeoutSec = data.timeoutSec;

// Show the pdata in the console
console.log('Triggering refresh of DEPT', data);

// Use the incomming data
$('h1.t-Breadcrumb-label').text(message);
This provides an easy way to parameterize the calls to custom dynamic action events.
One more thing
Dynamic actions can also be defined in the Global Page (page 0). This means we can place any application-wide logic in custom events on this page, and call it from any page in the application.
Summary
Creating custom events in APEX is easy, declarative, and gives us several benefits and possibilities:
Custom events can serve as JavaScript functions (callable units) - but the advantage is they are declared - and thereby visible to other developers just by opening the page in Page Designer.
The custom events can contain multiple (named) actions set up in a call sequence. This event can then be executed from many other places using apex.event.trigger(...). It can consist of a hybrid of built-in actions and JavaScript or PL/SQL actions.
The events can be bound to the level where the code logically fits (document, region, item...)
Parameters (data) can be passed to the custom event when calling this, which makes the custom events highly reusable.
I hope you have enjoyed this article, and will consider this approach to make your APEX application code more readable, supportable and reusable.
/Martin

